Instance Scheduler
The Instance Scheduler provides users with the capability to effectively manage the operational hours of their instances, resulting in resource optimization and cost savings. It allows users to reduce costs by turning off resources during off-hours or periods of low workload. In this section we'll guide you through the process of managing and creating schedules for your EC2 instances.
Accessing the Instance Scheduler Dashboard
Upon accessing the Instant Scheduler dashboard, you'll find a comprehensive list of upcoming and past schedules. This intuitive interface facilitates seamless management of your scheduling needs.
Integrating Instance Scheduler
- A Cloudformation stack is used to set up an instance scheduler on each AWS account in which the user wants to use the instance scheduler. The Cloudformation stack creates the following resources
- Updates the OpslyftFetchUsageMetric IAM role to include the permissions for Instance scheduler (i.e. Start/Stop resources)
- Creates a Lambda function that uses AWS API’s to Start and Stop resources
- Creates an Eventbridge Rule to trigger the Lambda function at 15 minute interval
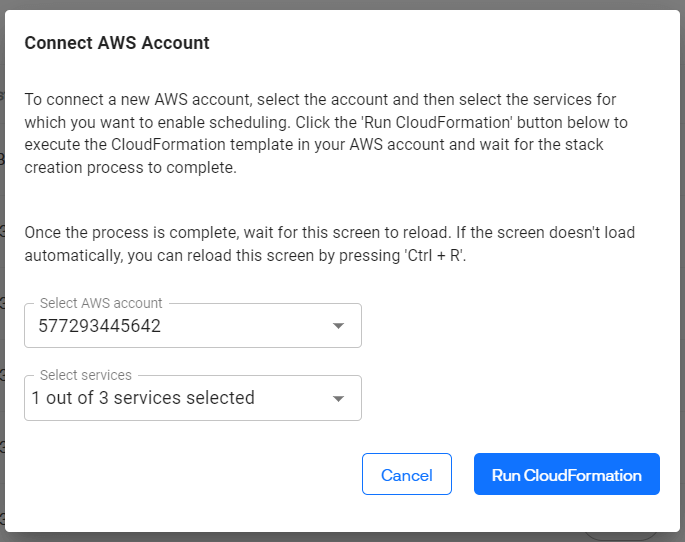
Users can configure the instances to be scheduled as rules on the Opslyft product, These rules are stored in Opslyft’s S3 bucket.
Lambda function fetches the instance Scheduler rules form Opslyft S3 bucket and Starts/Stops instances using the AWS API’s based on the schedule rules.
Deactivating Schedules
To deactivate a schedule, follow these steps:
- Click on the "Manage Schedules" button located at the top of the dashboard.
- Locate the desired schedule and navigate to the corresponding toggle button.
- Simply switch off the toggle button to deactivate the selected schedule.
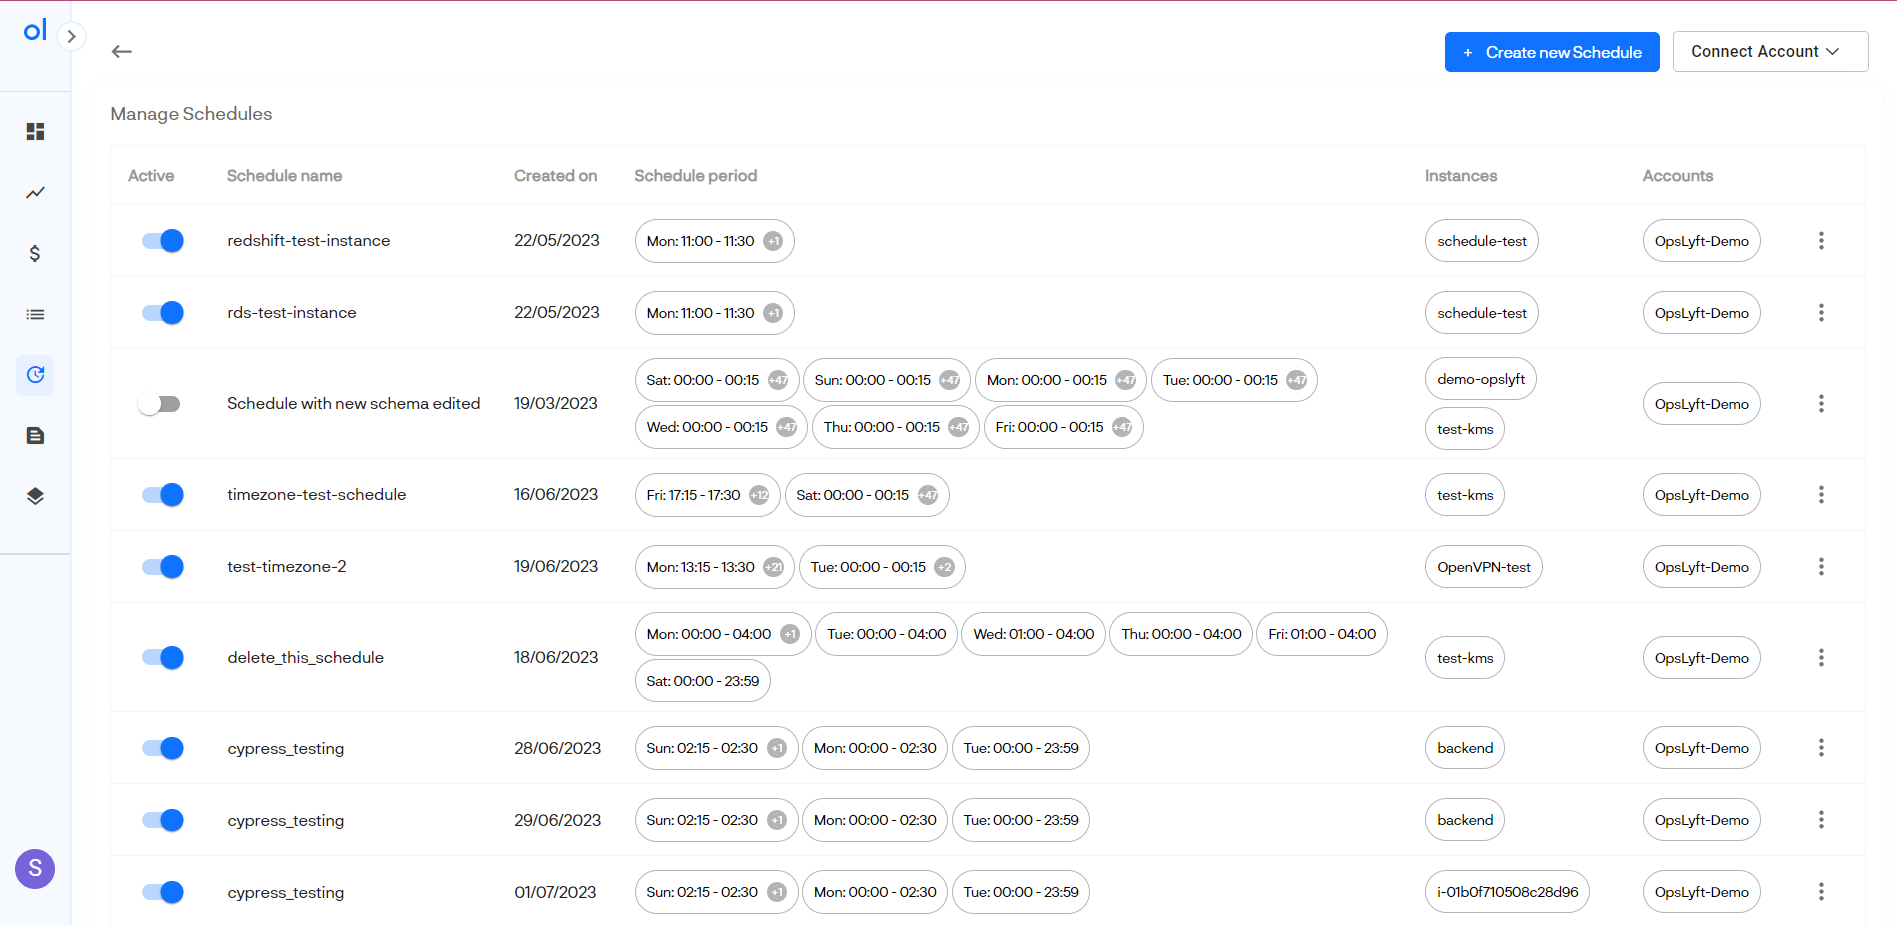
Editing and Deleting Schedules
Editing or deleting a schedule is straightforward:
- Identify the schedule you wish to modify.
- Locate the three dots icon on the right-hand side of the schedule entry.
- Click on the three dots icon to access a menu with editing and deletion options.
- Choose between "Edit" to modify the schedule or "Delete" to remove it.
Creating a New Schedule
Creating a new schedule is a streamlined process:
- Click on the button located in the top right corner to initiate schedule creation.
- Currently, instance scheduling is available for EC2 instances.
- Begin by assigning a descriptive "Schedule Name."
- Choose instances from the provided list that you wish to include in the schedule.
- After selecting instances, proceed by clicking the "Next" button located at the bottom right corner.
Defining the Schedule
- On the subsequent page, set the "Schedule Start Date" to indicate when the schedule becomes effective.
- Utilize the interactive calendar view to define your schedule timeline.
- Adjust the schedule by dragging and dropping to designate the hours when instances should be stopped.
- You can select multiple hours and days with ease, streamlining your configuration process.
- To deselect a specific period, double-tap on it within the calendar view.
Email Notifications
Stay informed by setting up email notifications:
- Once your timeline is ready, proceed to enter recipient email addresses.
- Recipients will receive alerts before instances are scheduled to stop.
- This ensures your team is well-prepared for any operational changes.
Conclusion
The Instance Scheduler feature primarily focuses on cost-saving measures by automatically shutting down or deactivating EC2 instances during periods of low utilization or off-hours. With its intuitive scheduling options and user-friendly controls, this feature provides a potent tool for optimizing resource allocation, enhancing cost-efficiency, and streamlining operational management.